How To Make An Oval Basket Setting Without A Forming Block
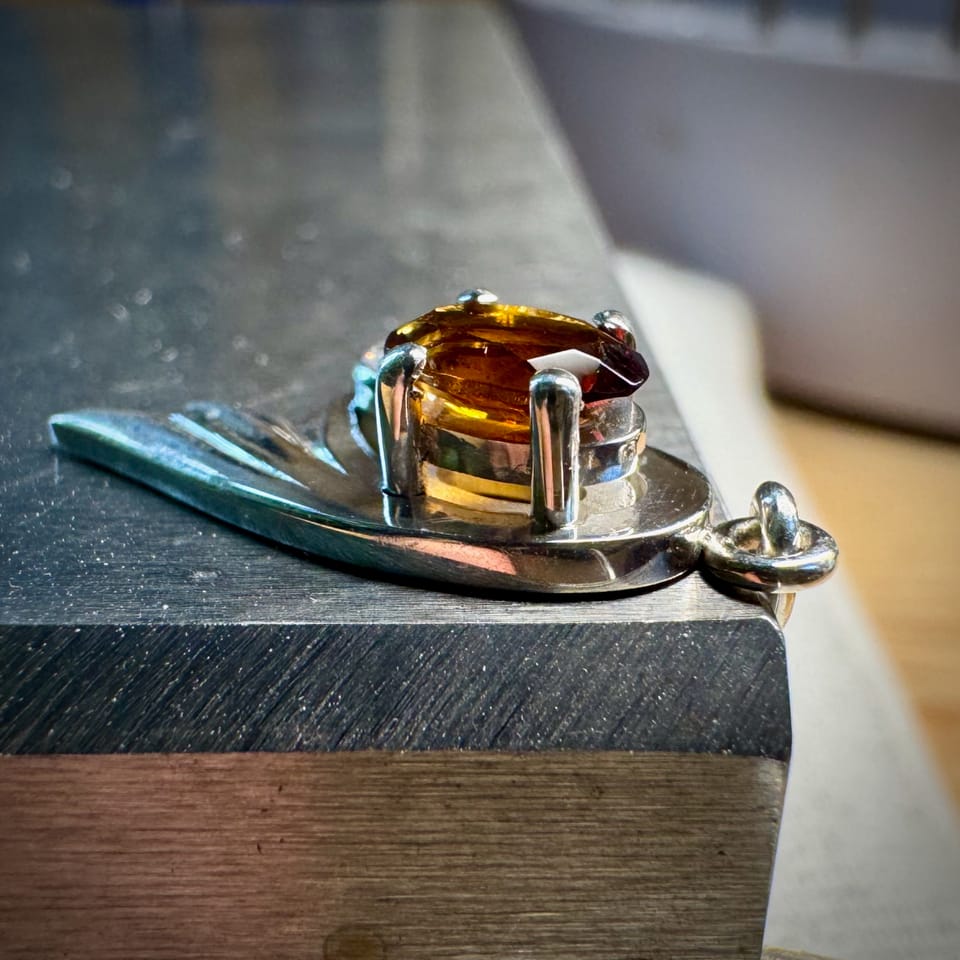
If you make rings, you’ll eventually want to use oval stones in your designs. While it’s relatively easy to make a basket setting for a round stone, it’s tricky to get the curvature even and symmetrical with an oval shape.
The first thing that comes to mind is to use a bezel-forming block. As you may know, there are generally two types of blocks: 17 and 27 degrees. It’s a great way to create an even bezel, especially if it’s a single one on the ring.
But what if you need a different angle? It’s still possible to do it with a 17-degree block. You just need to tap your bezel in a slightly bigger hole with a planishing hammer to taper it partially. You can then even it with the punch that comes with the block. Then, you need to saw a gap in the middle to create a basket and solder the prongs.
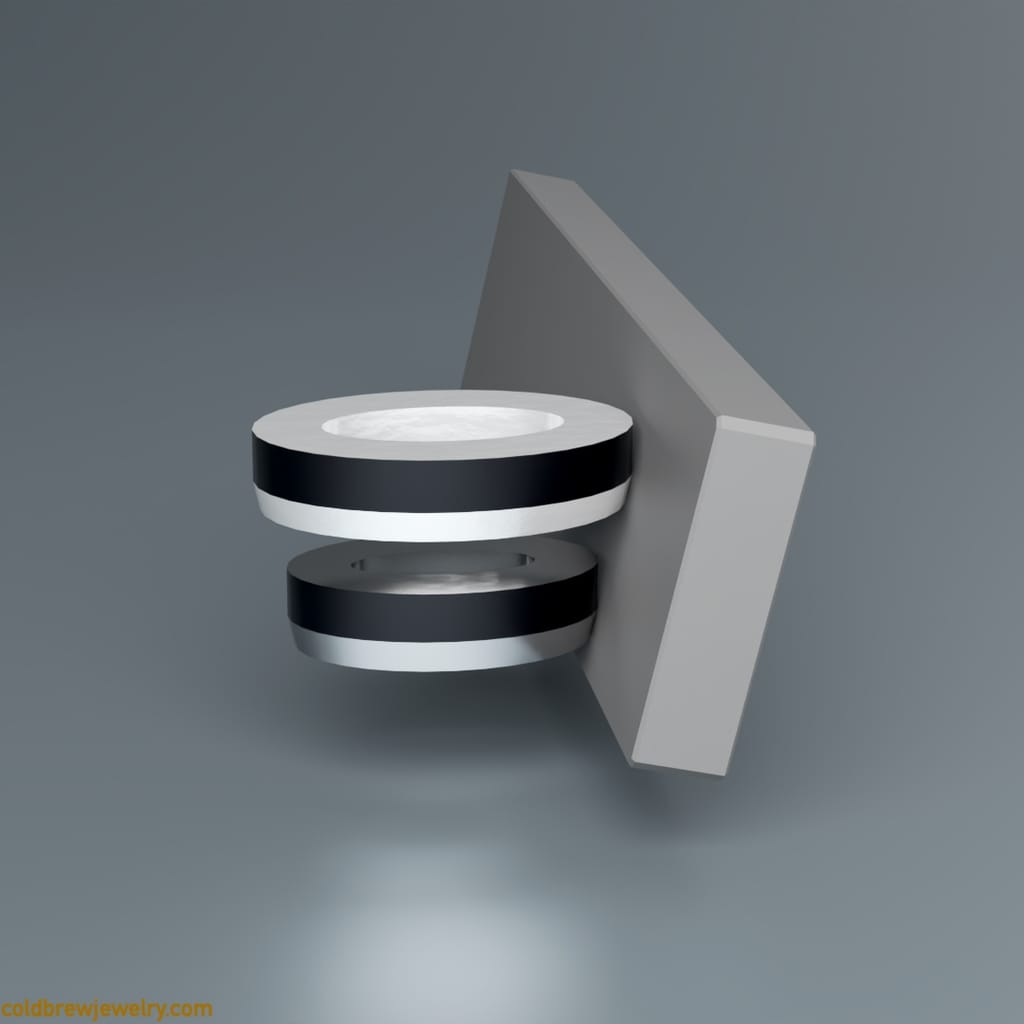
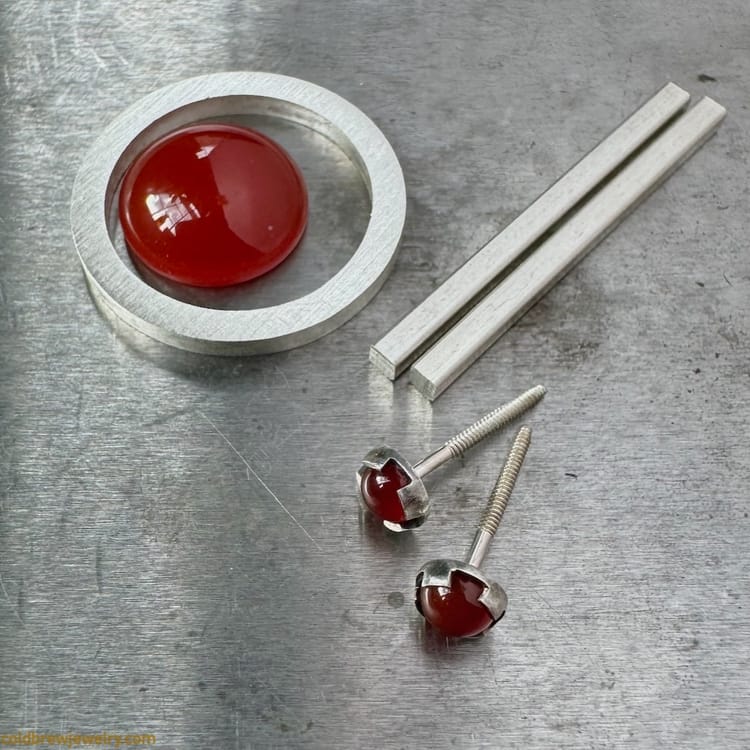
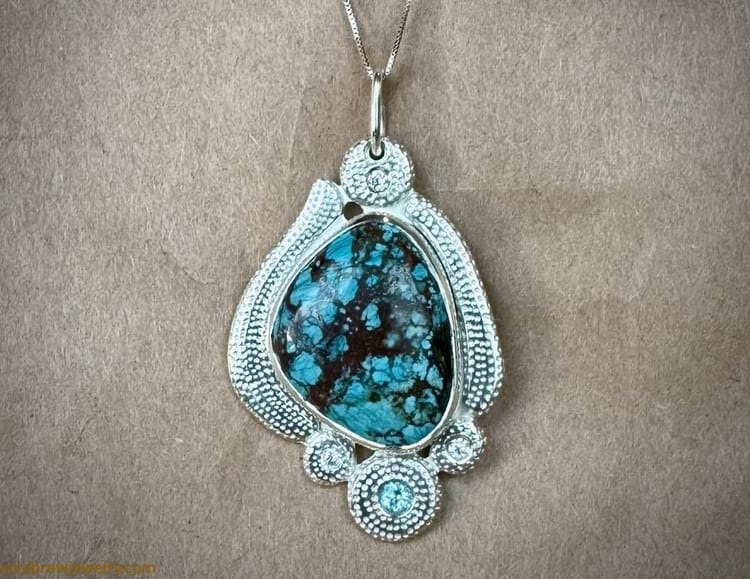
That sounds great, but what if you don’t have a forming block? A quality one isn’t cheap, after all. In the picture above, you can see an earring that I made with an oval stone set. I didn’t have a forming block at the time, so I had to devise a way to make an oval setting.
As jewelers, we often find ourselves solving engineering tasks to come up with a solution to a challenging task. And this one isn’t an exception.
Let’s see how we can create a basket setting with the essential tools.
The oval faceted cut is considered fancy (see An Introduction To Fancy Gem Cuts). Nevertheless, there are industry standards around the sizes of oval stones (see Standard Gem Size Chart). You can usually find calibrated stones to buy, but even those may slightly differ from the standard sizes. In our case, it’s not an issue since we can accommodate any size and shape.
I usually start by drawing a template either by tracing the edge of the stone or by drawing it on my computer and printing it.
The basket setting usually consists of two rings connected by prongs. One option is to make a jump ring from a round wire slightly larger than the width of the stone. Then, you can use your parallel pliers to squeeze it into an oval carefully. You can add the prongs using U-shaped pieces of wire. And it would be an excellent simple basket setting. But I’d like to talk about a basket you’d typically make using a collet-forming block, which means the basket’s walls are rectangular in section.
For an oval stone, we need to make an oval ring. Theoretically, we could pierce an arc-shaped piece of sheet metal, manually turn it into an oval using round-nose pliers, and solder it. You could even use a piece of relatively wide wire to side-bend it to an arc and then form it into a collet. I find it challenging to do it this way without a forming block, especially when using the wire.
I’ve seen the approach described below used for rectangular-shaped settings, mostly because aligning such shapes is easier. Please keep reading to see what I mean precisely.
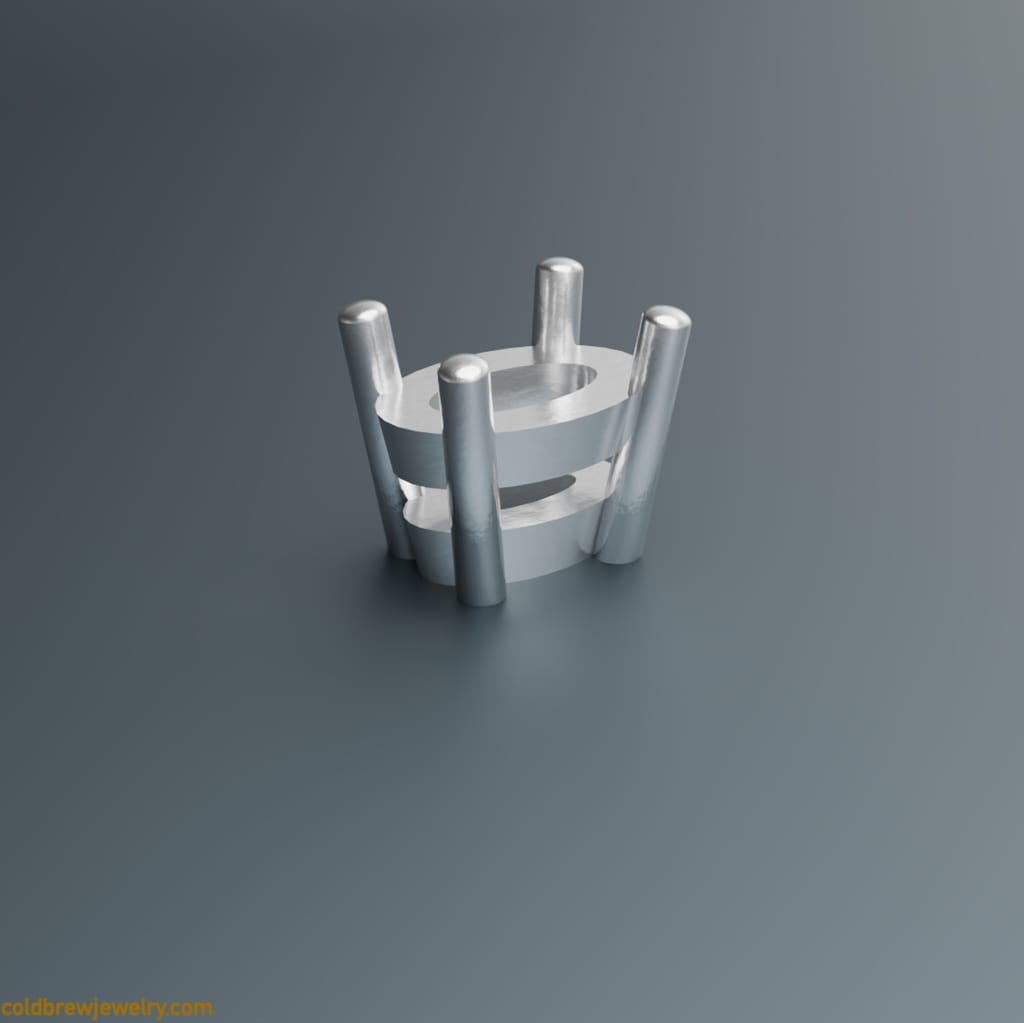
Let’s take a look at the setting.
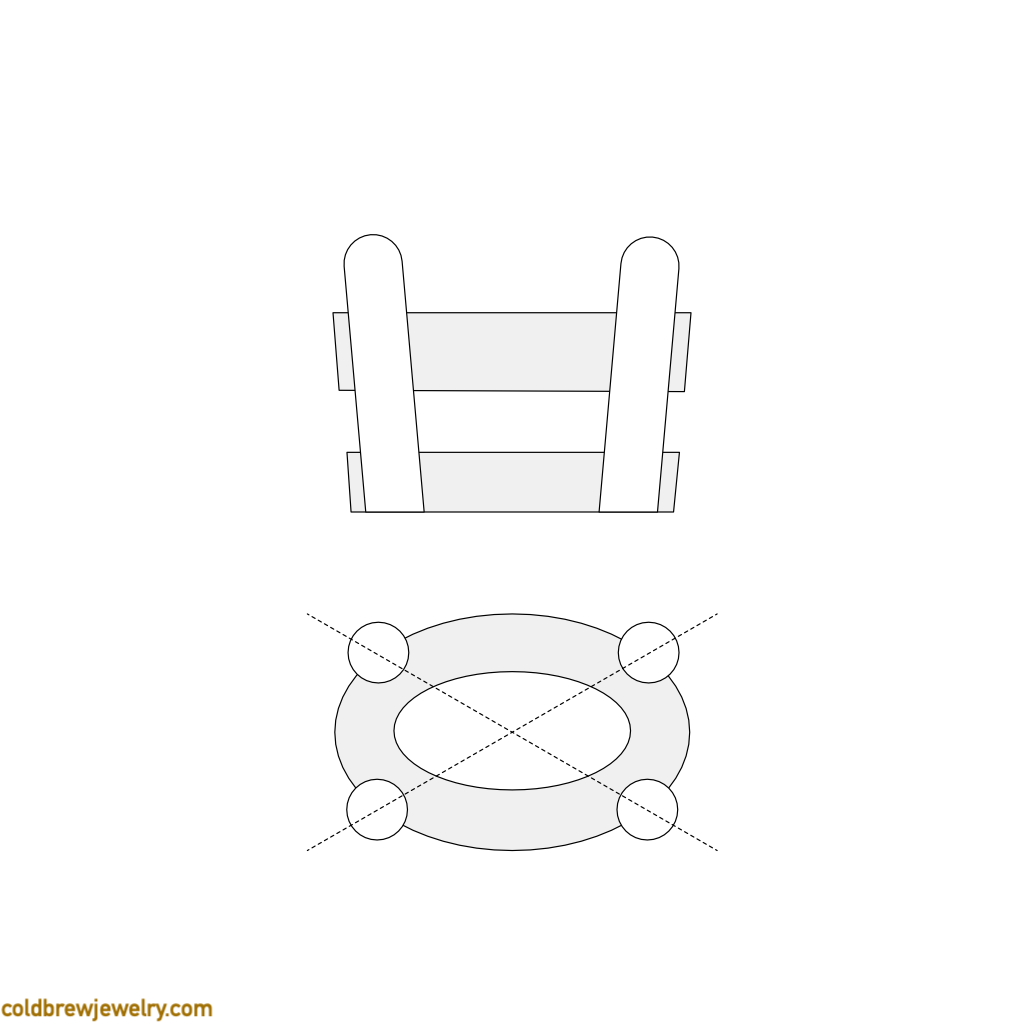
It has two ovals and four prongs. Let’s forget about the angle of the prongs for a second. What we see is just two small oval loops. Technically, they are often referred to as under-bezels. But I’ll stick to the loop for brevity’s sake. The maximum height of each loop depends on the overall setting height. The minimum height depends on the type of the metal you’re using. In this example, I’m using sterling silver. Thus, we’ll use a 1-1.3 mm loop height to keep it sturdy enough. But with platinum, for example, you can surely go with less than one millimeter.
In fact, the bottom loop will be 1 mm, and the top one will be 1.3 mm to make it look better. If you look at the rings, for example, featuring a basket setting, you’ll often notice, depending on the design, that the bottom part is thinner. That’s because its primary purpose is to make the whole construction sturdy and rigid. It also adds another point of contact for the prongs, which makes them more reliable. So, the thickness isn’t that critical for this part. It’s just the fact that it’s there. We’ll also keep the gap size between the loops to 1 mm.
Now, let’s talk about the angle of the prongs. As mentioned, 17 and 27-degree collets are suitable for single-stone settings. For three-stone settings, for example, the angle would be too steep to arrange them in a row and still match the curvature of the ring.
The size of the loops defines the angle. The more significant the difference between them, the bigger the angle. So, we can control the angle pretty precisely this way. The catch is to calculate the size of each loop correctly. One might argue that training your eye is better than calculating everything. But nothing stops you from switching from calculations to manual measurement as you practice more.
Let’s see how we can do that. I prefer using a vector graphics editor on my Mac. But it’s possible to do it by hand with some stencils. Cooksongold has a great selection of them, for example. First, we need to decide what angle we’d like to have. Say, we need a 10-degree angle.
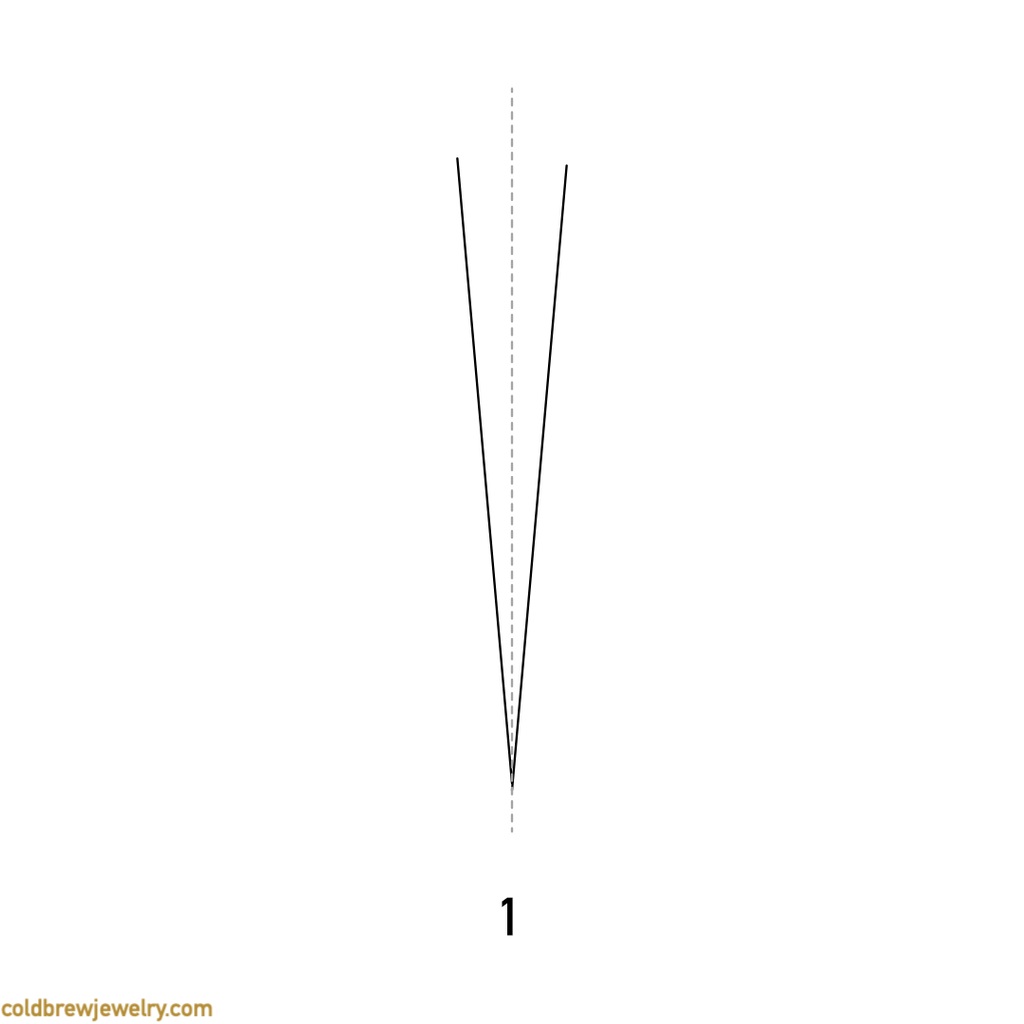
In this example, we’ll make a setting for an oval-cut citrine. The stone is 4 by 6 mm and 2.4 mm in height, but we’ll focus on its length for now.
The top loop should be the same or slightly less than the size of the stone so that it’s not visible when looking at the setting from the top. We also know the width of the top loop, so let’s add it to the drawing:
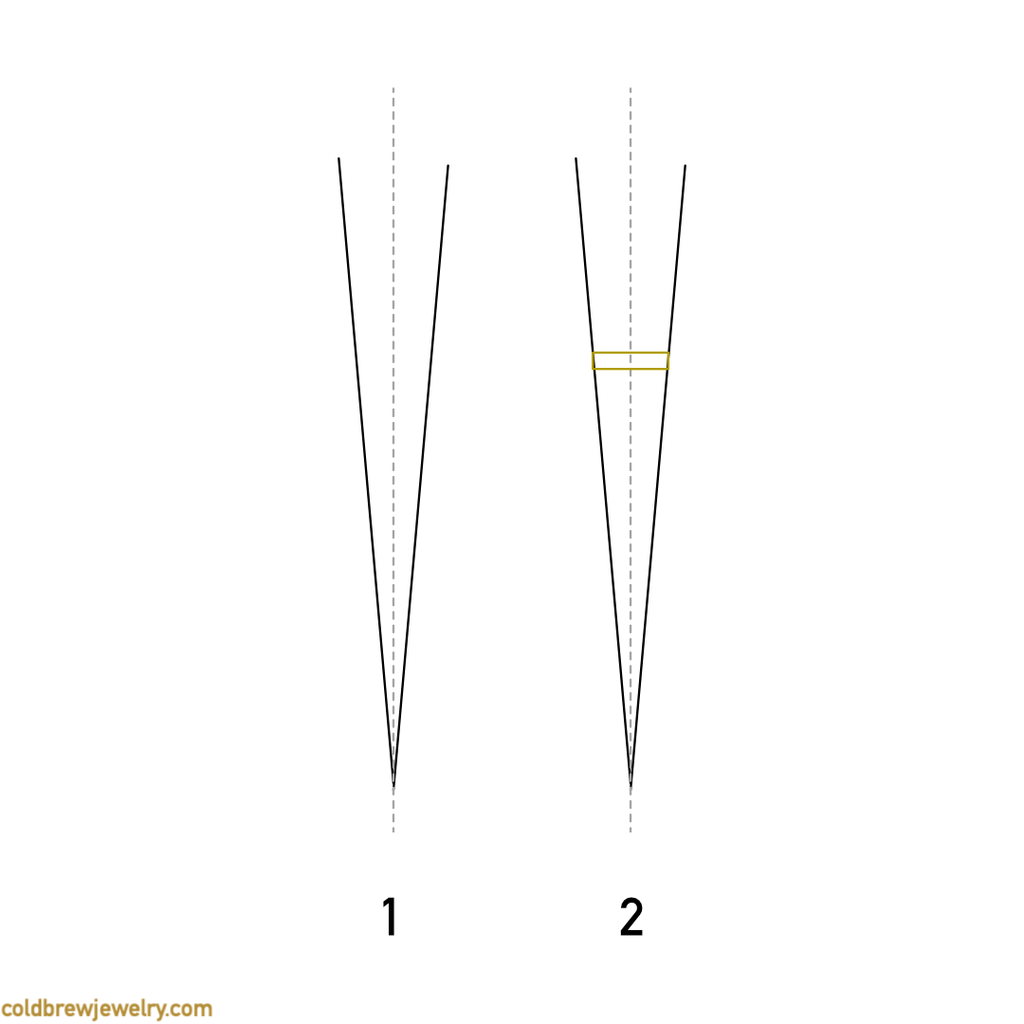
We place the loop so that the top side fits precisely between the sides of the angle. We also know that the height of the top loop is 1.3 mm, and the gap between the loops is 1 mm. Let’s find the spot where the top of the bottom loop should sit:
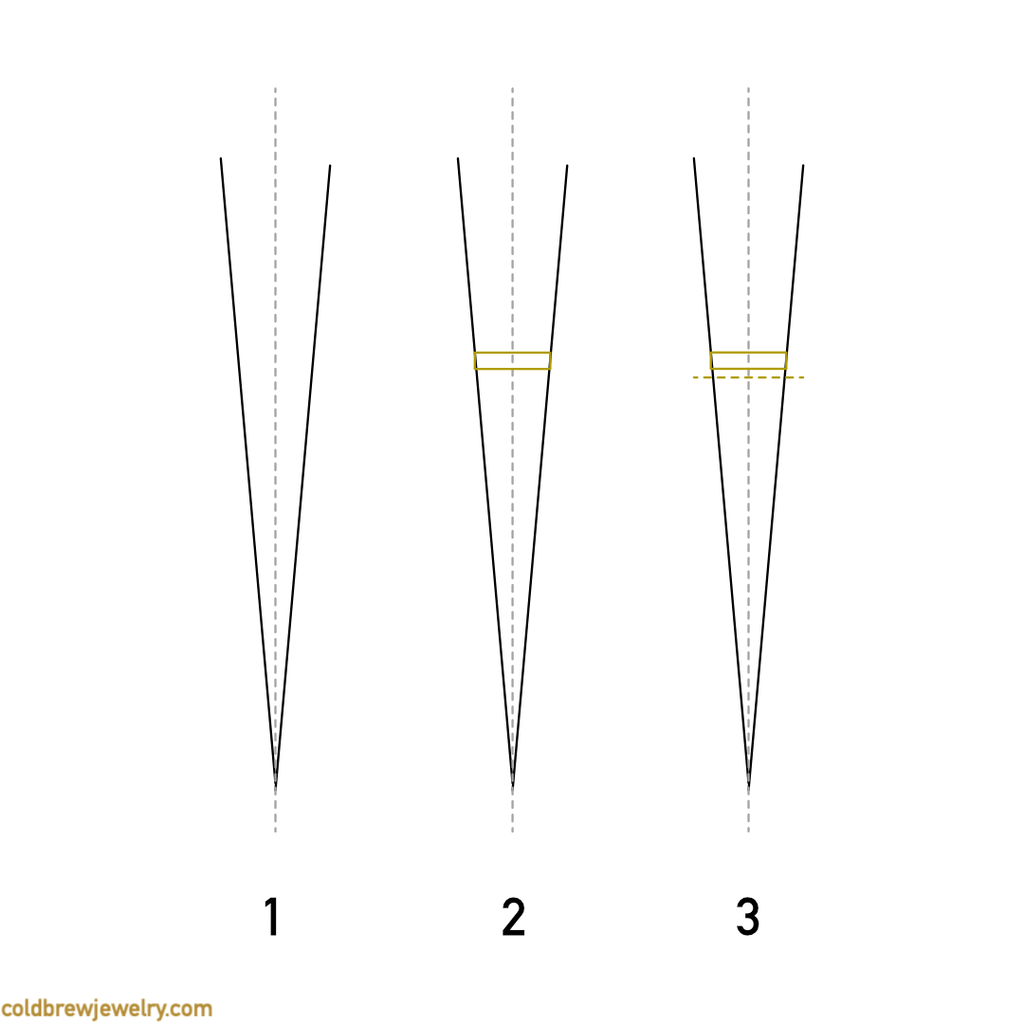
We also know the height of the bottom loop, which is 1 mm. Always double-check the height of the stone to ensure you have enough room to protect the culet. Let’s add the bottom loop:
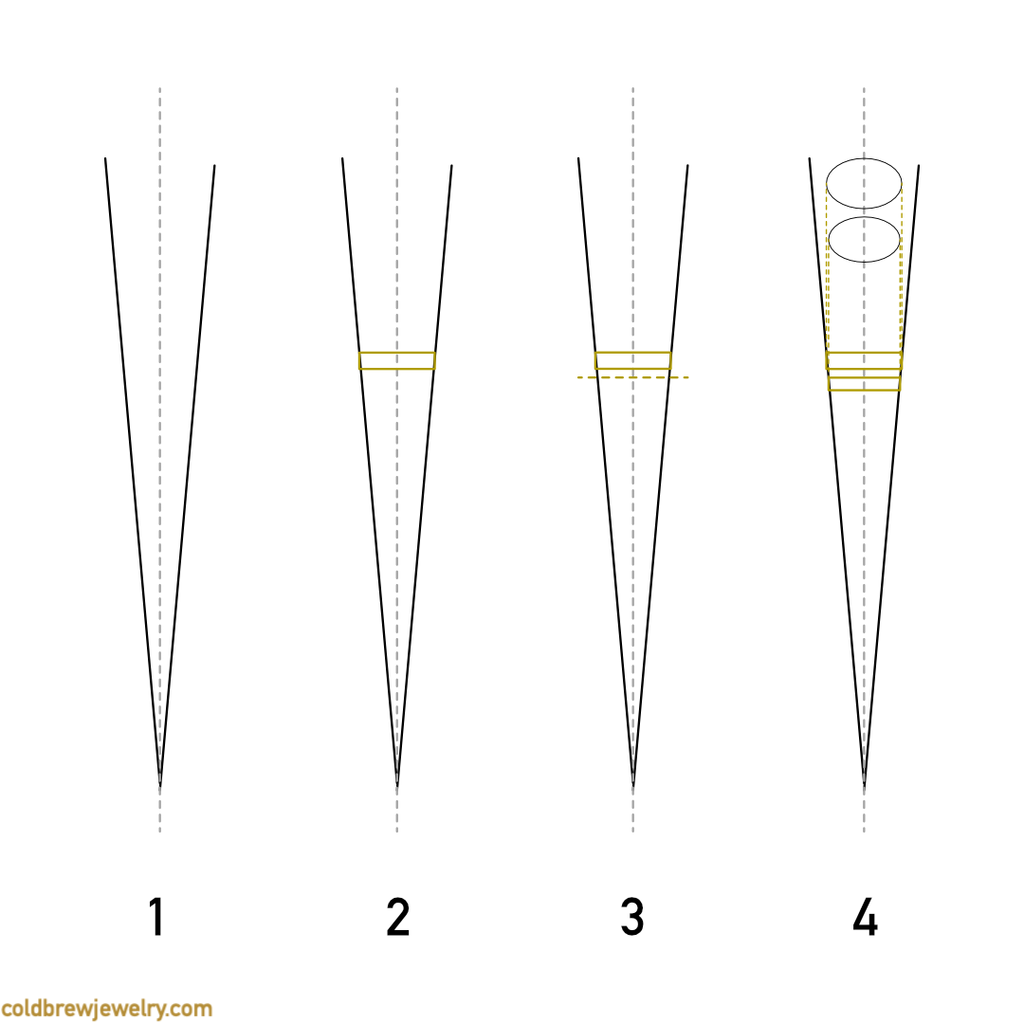
If we file the side of the setting by placing the needle file on both loops, we’ll get the required angle. To ensure you have the correct angle on both loops, mark them with a Sharpie and slightly file them. If you see any spots with the Sharpie on them, you need to file more to get the correct angle in those spots.
But what about the inner side?
Since we’re using silver, we’d like the "walls” of the setting to be at least 1 mm. The other requirement is that the stone shouldn’t touch the walls of the setting. We can certainly calculate the initial width of the “wall,” so we can file it down later to 1 mm.
I figured out three approaches for myself. You can always give the inner side an angle using your saw. You can do the first pass along the template line. Then, you can tilt the blade slightly and go around the inside perimeter of the loop. Remember, your blade can also act as a tiny file, and you can use it after piercing to even out the cut. It’s relatively easy to do. For the top loop, you don’t have to match the angle of the outer side because your guide should be the stone’s pavilion. You can check the angle by placing the stone on the opening and then adjust accordingly.
Honestly, I’d keep the inner side straight for the bottom loop. I believe it has a very minor effect on restricting the lighting of the stone.
The other approach is to file the inner side the same way as the outer one.
I prefer keeping things simple and using the third approach: create a bevel on the inner side of the top loop using a bur before setting the stone. The bevel should allow the stone to sit just above the setting without touching the metal. You can use a setting or a round bur, or a bud bur would work fine, too.
But before filing our loops, we must ensure they are centered and parallel, with the proper gap between them. One of my favorite “tricks” is making a temporary connection to hold separate parts in place. We’ll solder a piece of wire to both loops.
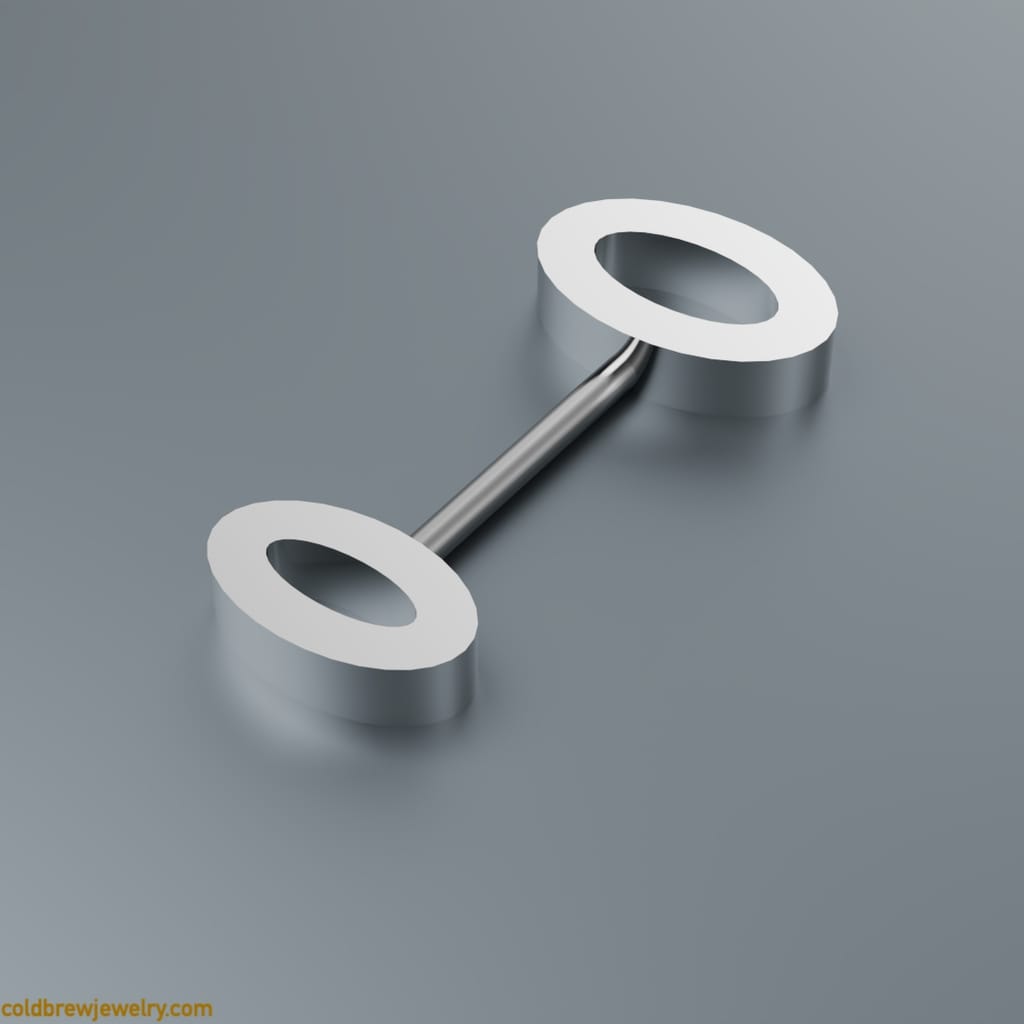
Before bending the wire to position one loop on top of the other, I prefer to mark the positions for the prongs on the top loop. It’s easier to do while it sits flat on the workbench. And you can keep it in place by holding the connection wire.
The exact position of the prongs depends on the cut of your stone. Ideally, each prong should sit against a facet on the top side of the stone, not against an edge.
If you’re using a calibrated stone, you can pre-calculate the positions of the prongs. Otherwise, you can put your stone on the setting and mark the spots with a sharpie. I’d put the marks only on one side. Then, you can use your saw blade to mark the opposite side and ensure that the markings are symmetrical. You can double-check by repeatedly measuring the distance between the marks and placing the stone on the setting.
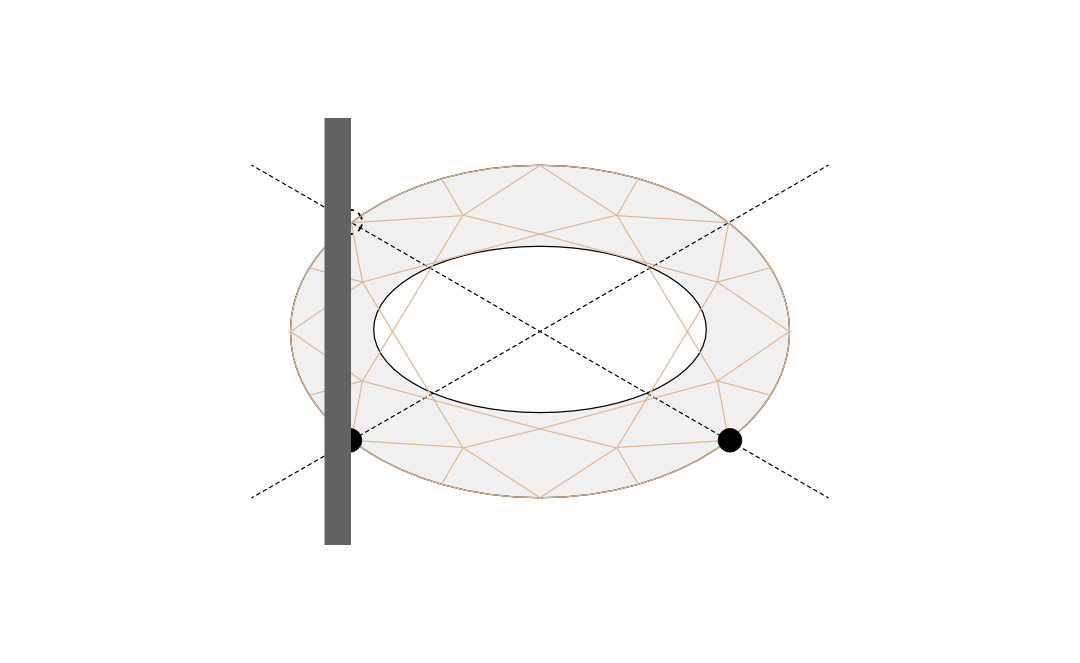
You can also place a template under the loop and add markings along the cross lines. After using a Sharpie to add little dots where the prongs would sit, I’d make little notches with a saw blade for each prong to make it easier to keep everything aligned and not lose the markings.
We can now bend the wire to position one loop over another. This can be a bit tricky. There are a couple of things to consider. The thicker and shorter the wire, the better it holds the loops in place. The longer and thinner the wire, the easier it is to position the loops against each other.
In this case, I’m using an 18-gauge wire approximately 13 mm long.
When you bend the wire after soldering, remember to bend slightly closer to the larger loop so that the smaller one ends up in the right spot.
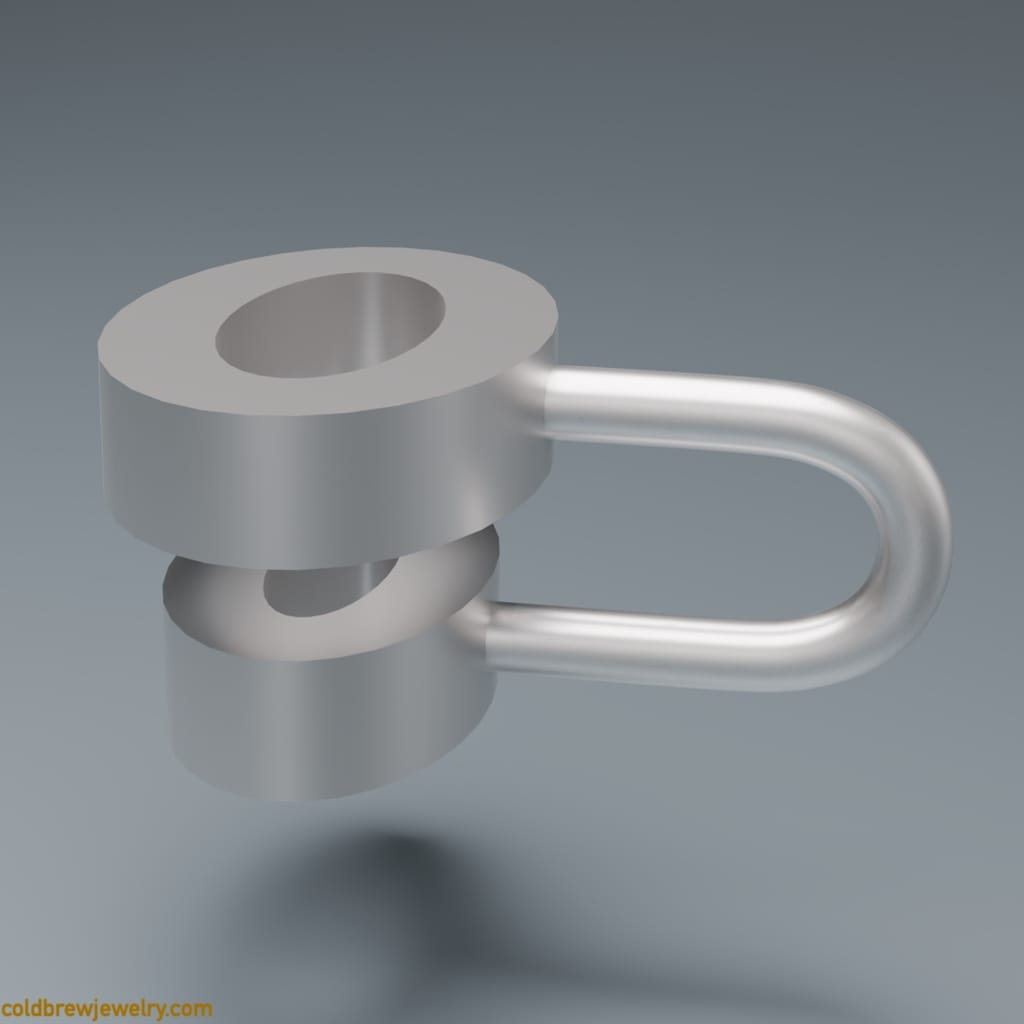
While bending and adjusting, I placed a piece of 1 mm thick scrap silver between the loops to achieve the proper gap size. Adequate positioning may require some tweaking here and there, so take your time.
Please try to keep the connecting wire only bent in one plane. Depending on how you’re going to solder the prongs, you may need to hold the wire in tweezers or a clamp. When you heat silver for soldering, it becomes very soft and deforms easily under load, thus changing your alignment.
Now that the loops are aligned, you can file both on the side, as described above, to get the angle you were shooting for. Be careful not to misalign the loops while filling. One thing you can do is glue both loops to the piece of silver you put in between to ensure an even gap of 1 mm. This way, you can file without worrying about accidentally moving parts out of place.
The glue will come apart when you heat the setting later for soldering. This is also why you still need a temporary connecting wire instead of relying entirely on glue. Make sure not to inhale the fumes because they are toxic.
At this point, we have two loops that we need to connect with four prongs. To do so, we need to cut the seats for the prongs.
This is one of the trickiest parts. We’ll start by creating tiny cuts across both loops to create a groove that you will adjust later with a cylinder bur. The cuts should be perpendicular to the top side of the setting. This is pretty tricky and requires some practice. The key is to ensure that you’re looking at the setting from the proper angle. However, the goal is not to create a perfectly straight angle but to use the same angle for all the prongs to make them look symmetrical. Look at the illustrations below.
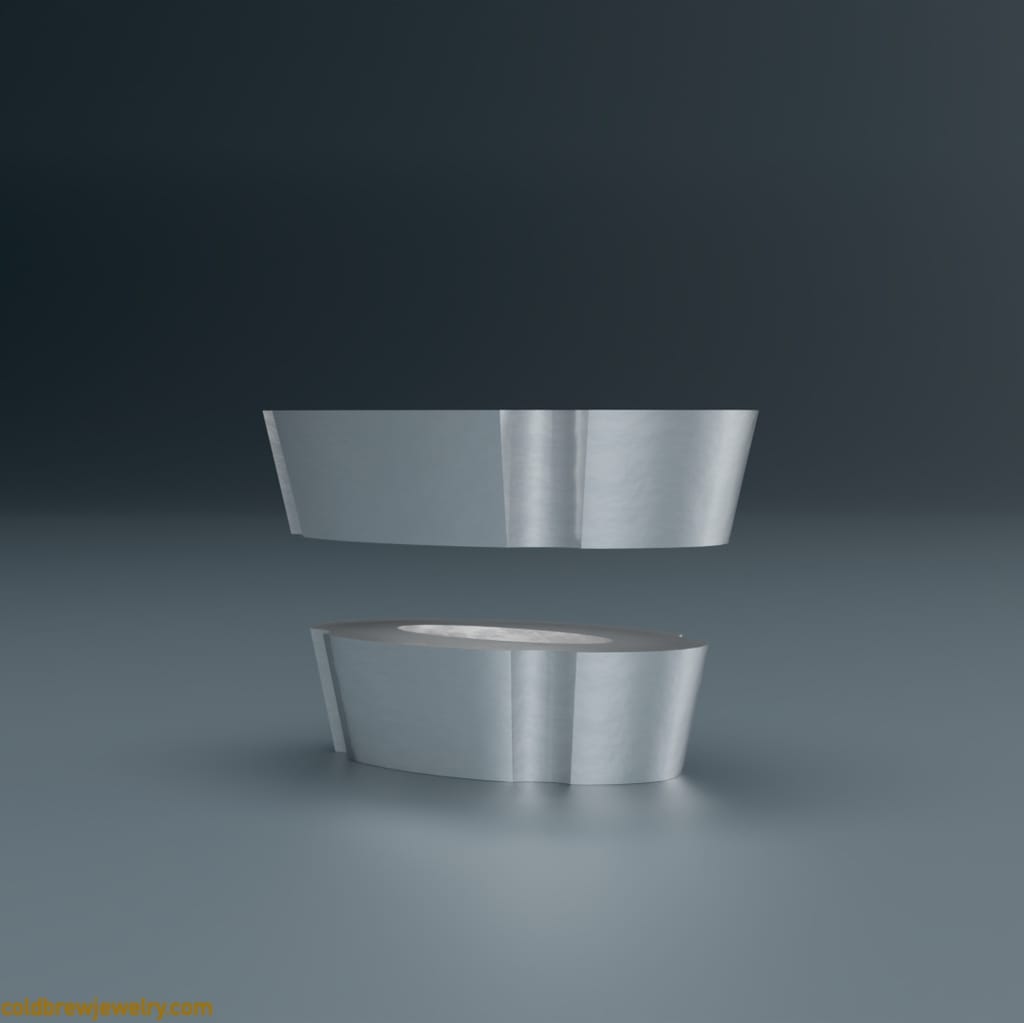
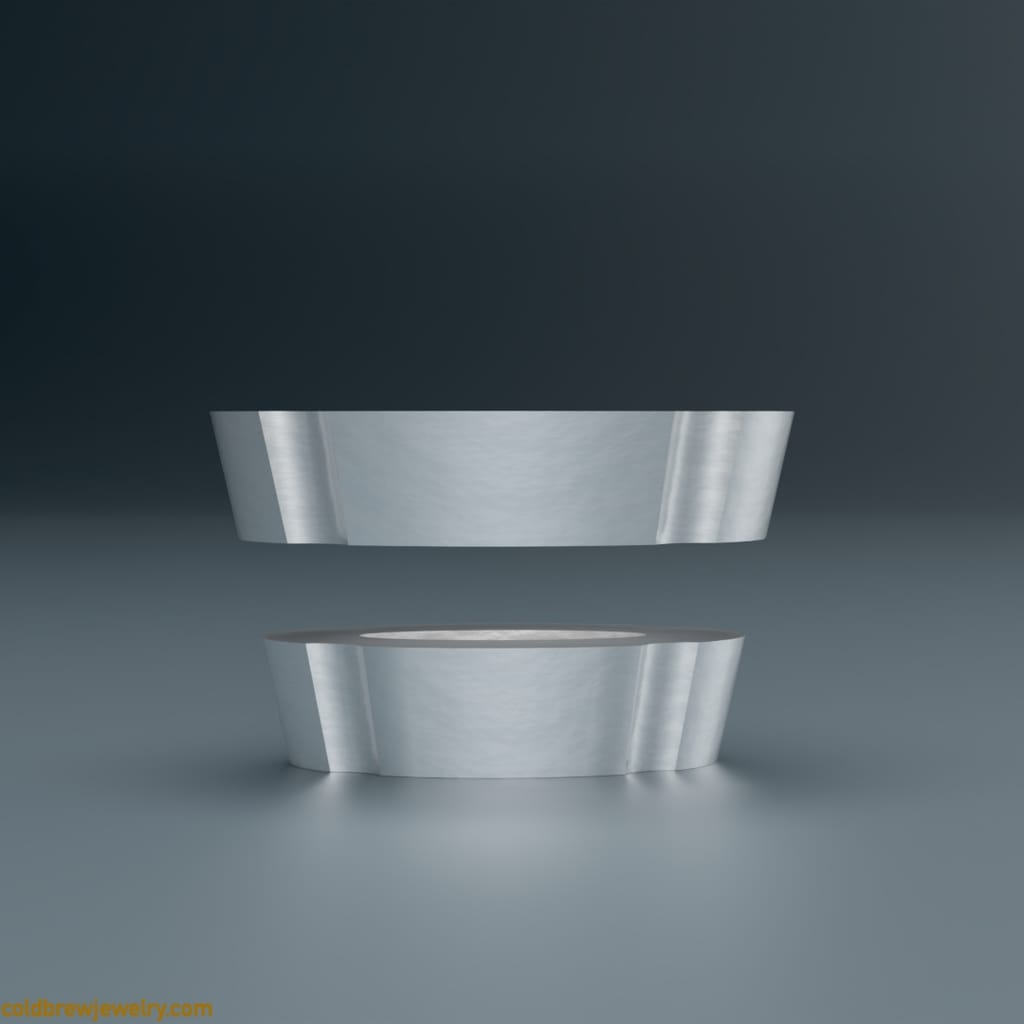
When you make a groove this way and then look from the side, you’ll see that it’s at a slight angle. Next, you need to enlarge both grooves to the diameter of your wire. It’s 1 mm in our case, so I’d use a 1 mm bur.
One thing that I learned from Blaine Lewis and his videos is that you need to let the bur do its job. If you give it enough speed without over-pushing in any direction, it will cut precisely without catching and running around your piece. I also noticed that I tend to push the bur slightly toward me when I cut. I sometimes turn my work over and cut from the opposing side to offset it. Or I just check often to see if I’m still on track. When I cut the second seat, I constantly check by placing the prongs in the grooves and checking if they are at the same angle. It is crucial because the slightest misalignment may be noticeable depending on your design.
Now it’s time to solder the prongs. You want to cut slightly longer pieces of wire so that it’s easier to close the prongs later. I usually put the loops in cross-locking tweezers for it to hold them by the connecting wire. Remember, all the pieces are thin and lightweight, so flame control is critical to not overheating everything. I usually use hard solder even though I used it to solder the connection wire. Since the melting point of hard solder gets a bit higher after it flows once, you can carefully use it for other joints that aren’t too close to that first one.
After you have two prongs in place, you can cut off the connection wire and repeat the process on the other side of the setting: file it at an angle, create a groove, enlarge it using a cylinder bur, and solder the prongs.
I’m still using the hard solder for the second pair of prongs, but I put the setting on the soldering board to rest on the soldered side.
Conclusion
This approach requires considerable attention to ensure that the setting’s shape matches the stone’s. But with some practice, it’s not very long to make. You also have reasonable control over various parts of the setting. As for setting the stone, I can refer you to another video by Blaine Lewis that contains many helpful tips.
To be fully transparent, it took me five tries to make an oval basket setting with symmetrical prongs at the proper angle.
If you have any questions, feel free to DM me on Instagram. Don’t forget to subscribe to my newsletter to be the first one to know when I publish a new post and receive some extra content!
Disclaimer: I’m not affiliated with any of the companies mentioned in this post. I included them because I either used their products myself or have seen them used by the jewelry community.

Member discussion