Jump ring adventures
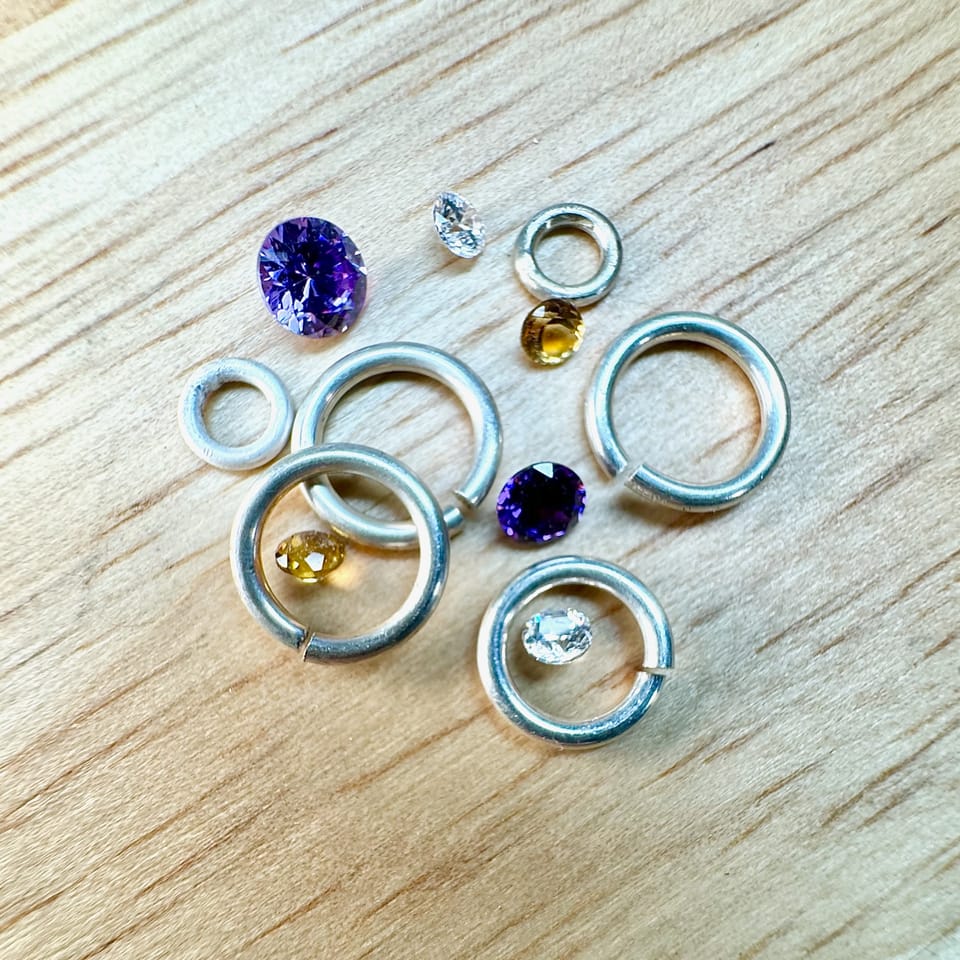
A jump ring is probably one of the simplest elements in jewelry. It’s straightforward to make and can be used as chain links, bail attachments, or stone settings. It’s a simple ring, after all. Yet, this smooth, shiny little donut makes beginners stumble again and again—and I’m not an exception.
Before we continue, I want to mention that I'm not a professional silversmith. These are my learnings as a hobbyist. I'm sharing them for informational purposes only, so use them at your own risk.
But what makes it so challenging to grasp? Let’s see what the process of making a jump ring looks like in books and tutorials:
- Wrap the wire around a round object of the diameter you need as many times as the number of jump rings you need.
- Cut the coil to split it into separate rings.
- Close the jump ring with pliers.
- Solder the ring.
It sounds relatively straightforward, but I figured there’s a catch at every step—and not just one.
Forming the coil
Jump rings can be big, small, thin, or thick, depending on the task. It boils down to the ring radius and the wire gauge. The thicker the wire and the smaller the radius, the trickier it is to make a jump ring.
If we take a relatively thin half-hard wire, say 20 gauge, about 0.8 mm, you can probably wrap it around a 2-3 mm rod just with your fingers. But 16 gauge presents a challenge.
If you make a lot of jump rings, you probably know that to make your life easier, you need to anneal the wire first. Since I don’t do rust too often, I thought that to make a couple of jump rings, I could go without it. Well, sure enough, it’s doable. If I put the rod into a vise, I can force the wire around it with pliers. The issue is that the wire becomes too springy, and the ring ends up being of a larger diameter.
After you anneal the wire, it becomes soft enough to wrap around without much effort. Be careful with the square wire, though. It won’t miss the chance to turn and lie on the corner instead of its side.
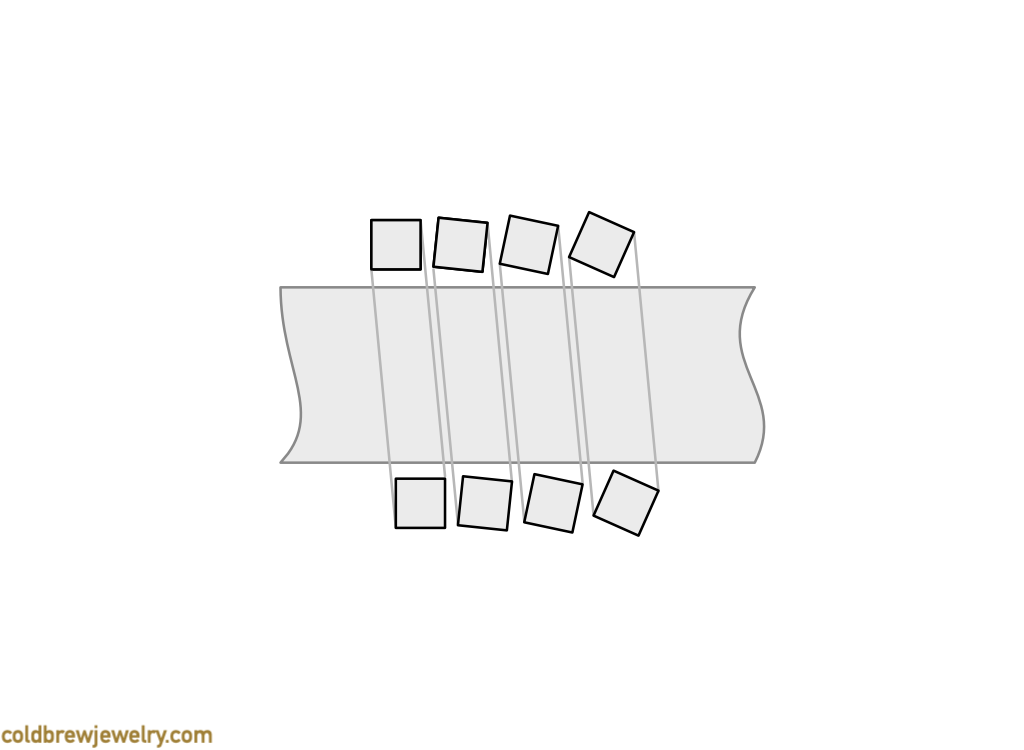
When you need just a few jump rings, pay attention to how you count the loops. The starting point of the first loop is where the wire fully touches the rod. Depending on how you hold the end of the wire, this point can sometimes be easy to miss.
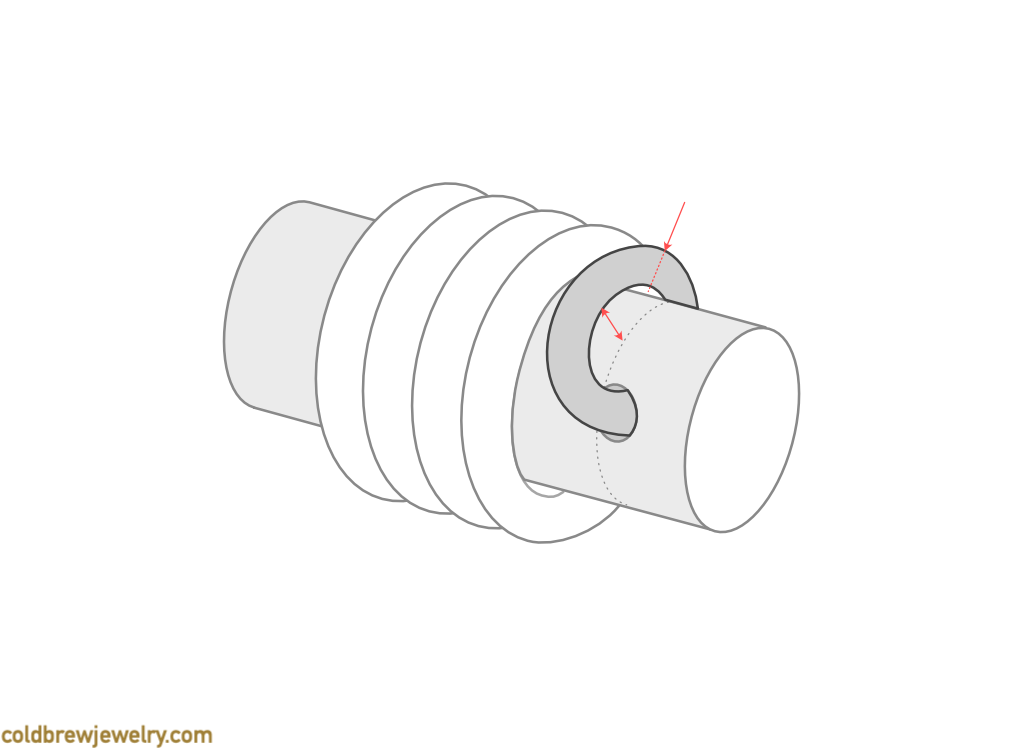
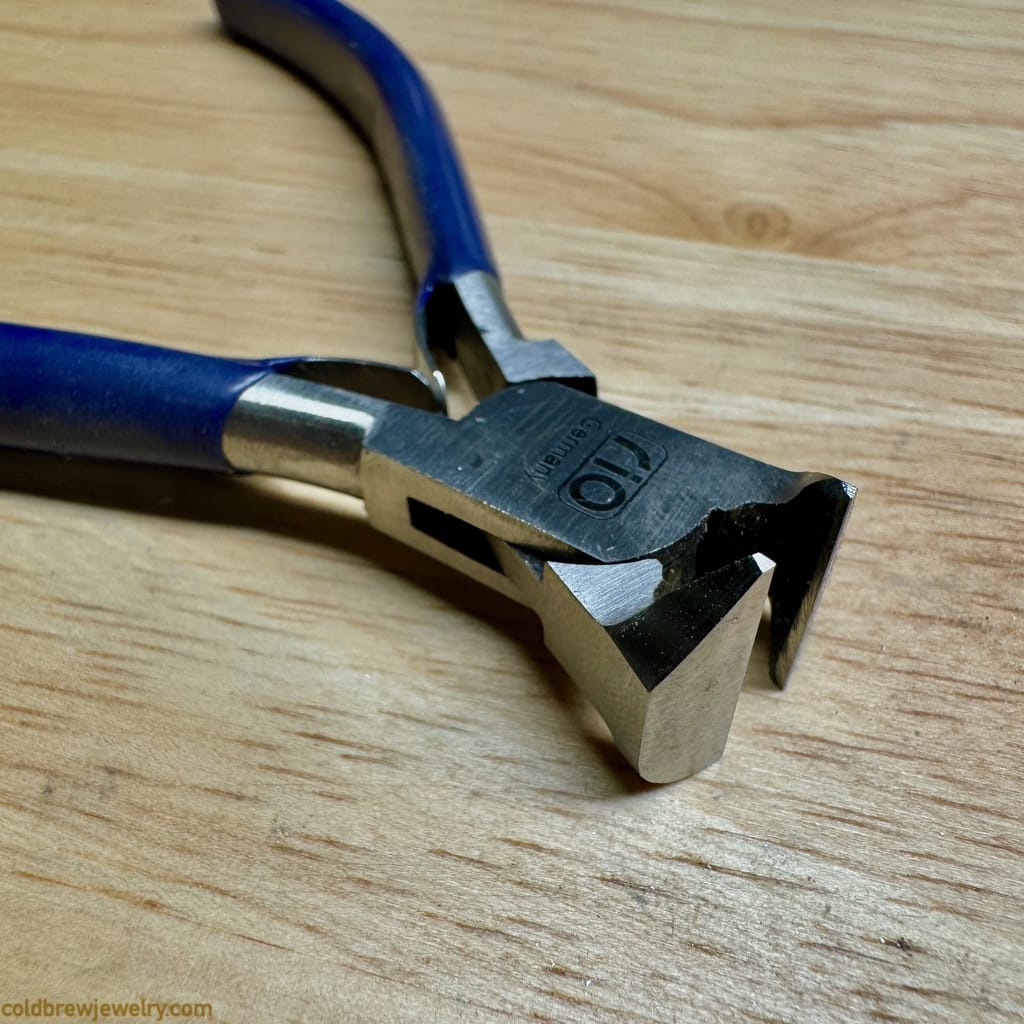
If you have a rod with a hole to hold the wire, remember that to remove the coil, you need to cut off the part in the hole. I use a pair of front cutters because they have a narrow part, but side cutters would work just as well.
Cutting the coil
The next part can be challenging unless you position your coil appropriately. I’m talking about sawing. There are a few things to keep in mind:
- You need to saw toward the center of the ring to get a cut perpendicular to the circle’s curve. It makes closing the jump ring easier.
- You need to saw at an angle so that your blade is in contact with just a couple of rings at a time. Otherwise, it becomes hard to get a straight cut because you need to make more moves to saw through one ring fully.
- You need to hold the coil firmly so your blade doesn’t wander around. Remember, you need a nice straight cut.
- You need to ensure the blade doesn’t hit the inner side of the ring when you saw through the last loop. It’s especially important when you have a small coil because you may saw through all of them at once.
The easiest way to combine everything is to have a groove filed in your bench pin. It allows you to keep the coil steady at a proper angle. It also lets you control the direction of the blade because it’s tilted toward the opposite side of the coil.
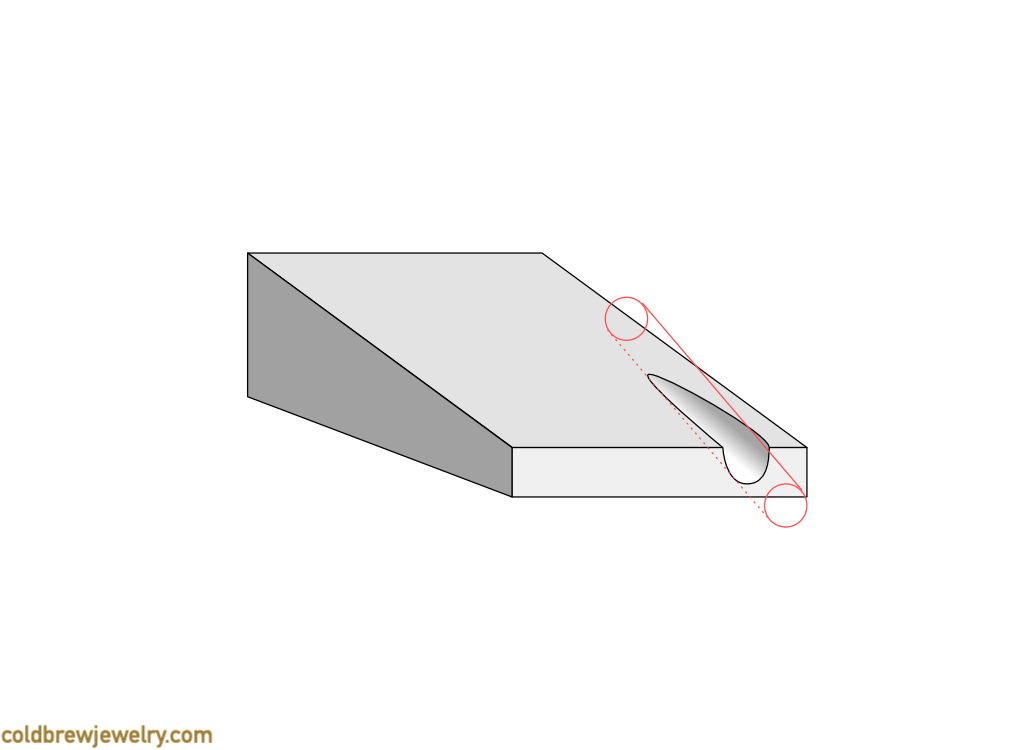
When the coil is short, you need to position it in the groove so the blade hits the bench pin first when it passes through one side of the ring.
If your coil is short and small, you may want to hold it with parallel pliers instead of your fingers.
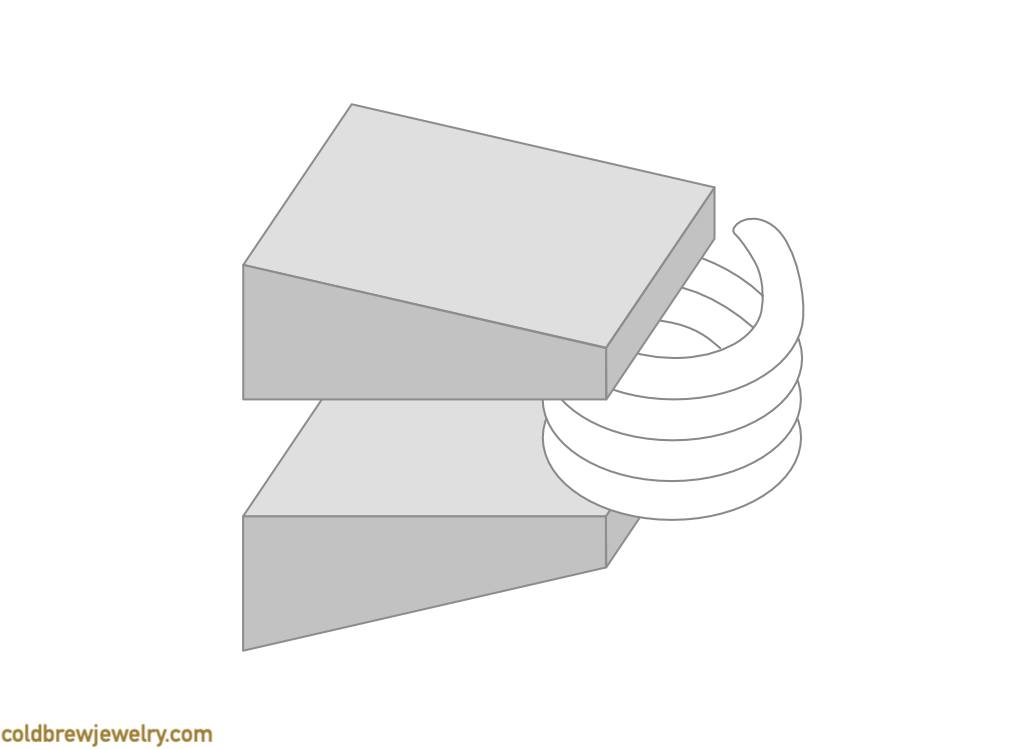
Again, try to position the pliers so that the bottom part of the coil sits on the bench pin and your saw blade has a stopper in its way.
Making jump rings by hand is totally doable. But if you make chains, for example, I highly recommend getting a jump ring-making jig. It not only speeds up the process but also helps with closing the rings. It’s a bit pricey but makes the process much easier and quicker, especially with thicker wires.
You can argue that, technically, this jig has nothing to do with closing. It only allows you to form the coil and saw it with great precision. But let me explain what I mean.
Closing the jump ring
When we cut through the wire, the saw blade takes out the amount of metal equivalent to its width.
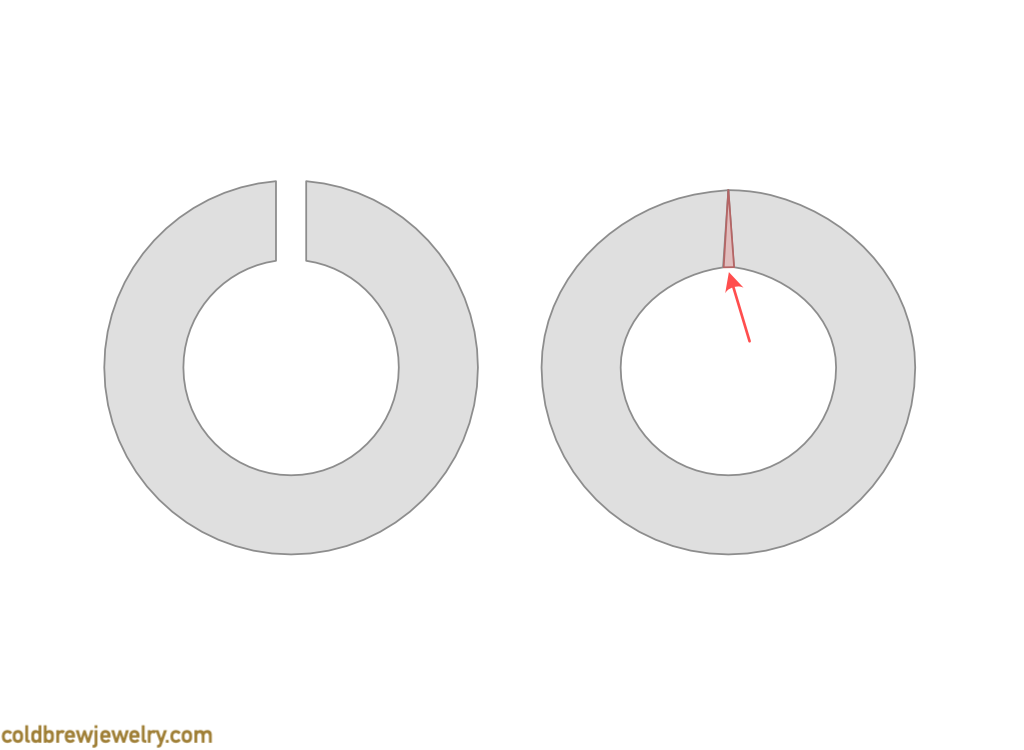
The thinker the blade, the more metal it removes. This means you can never close a ring with both ends flush and keep its round shape. With full-sized rings, you barely notice it because of the larger radius. The angle is so slight that it’s easy to close the ring flush without any light coming through the seam if you hold it against a lamp or a window.
But what about thicker, smaller jump rings? When you close them and look without magnification, you might not notice anything at all. But looking through a loupe, you may see a tiny gap on one side. This gap bothered me a lot at some point. But it turns out that if you properly align both ends without “steps” (or, in other words, misalignment), this gap won’t get in your way when soldering. But why?
Soldering and cleaning up
The reason is the capillary action you’ve probably heard of before in soldering. It’s not just the reason the solder flows through the tight seam. It also pulls parts together if the gap is small enough. You most likely had a situation when soldering something that took quite a bit to set up, and one part suddenly jumped out of place to entirely “stick” to another part in a way you hadn’t expected.
In the case of jump rings, it actually helps close that tiny gap. Because the gap is so small, the solder doesn’t pull the sides together entirely but happily fills it.
This means that the thinner the saw blade, the smaller the gap. The jig I mentioned above has a very thin blade that produces the tiniest gap.
It doesn’t mean that you don’t have to close the jump ring properly before soldering. You just don’t have to go crazy to chase that holy grail of the fully flush seam in this case.
There’s one last thing that can be very annoying: the final cleanup. It boils down to two things. One is the damage you make when you close the ring with your pliers. The only helpful thing that I found is the pliers with plastic jaws. Brass jaws also work, but probably not that well. One issue with plastic jaws is that they are very slippery.
The other thing is the excess solder. This is purely a trial-and-error way to get to the right spot. I usually ball up the solder before placing it on the seam because I found that it flows a bit better. But if you have a rolling mill, you can make a sheet of solder, which is very helpful. In that case, you don’t have to ball the solder for every job.
Great recommendations on soldering are in the book Soldering Demystified (a link to it is on the Resources page).
If you end up with some excess solder anyway, you can try removing it with a round or half-round needle file or a sanding stick, depending on the side of the numbering you need to clean. Keep in mind, though, that it’s easy to distort the round shape of the ring this way. One thing that helps me is to use a small abrasive silicone cylinder. You can use an old file to make a groove in the cylinder and then use that groove to go over the ring.
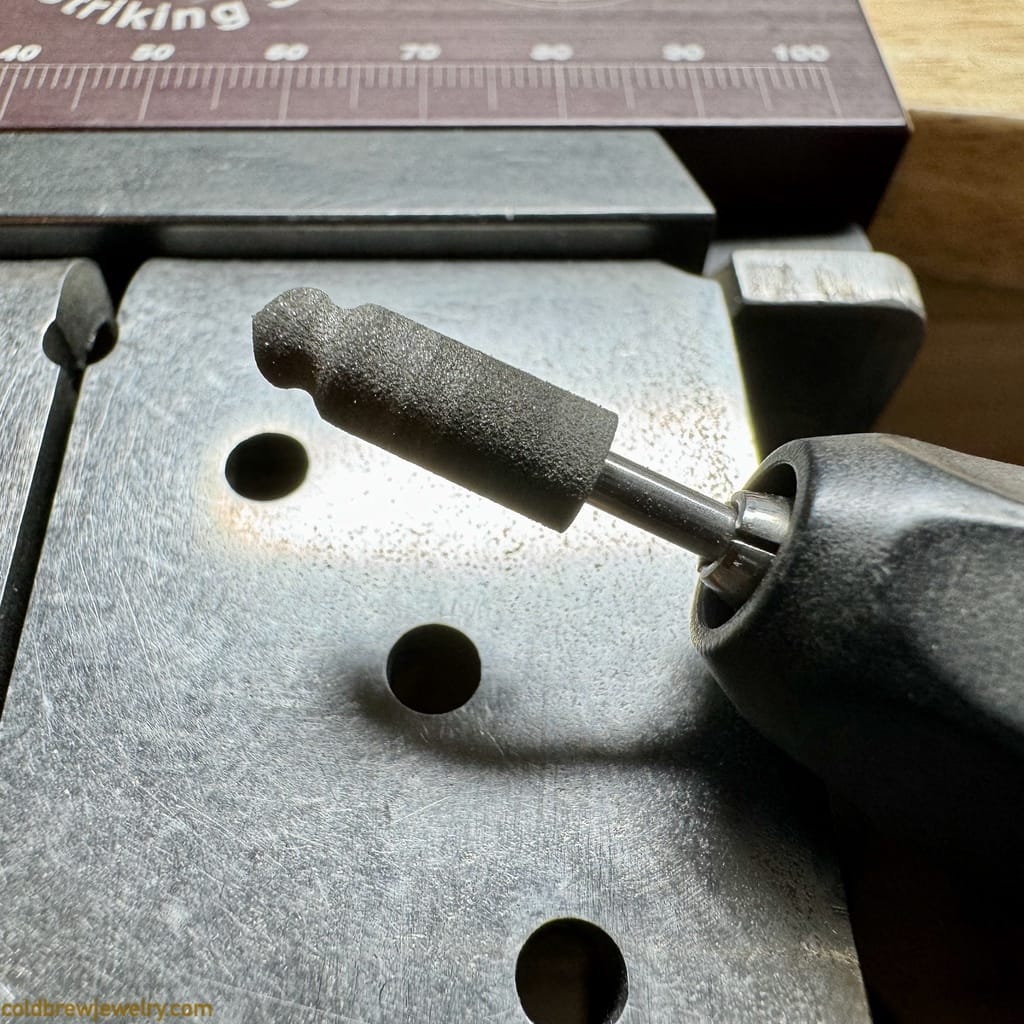
And that’s it. Now, we have a clean jump ring ready to be polished. Even when you know the theory, you must practice regularly to get used to the making process.


Member discussion